Are you tired of sagging winter covers while removing dirt and leaves from your pool?
Having a pool cover prevents debris from getting into your above-ground or in-ground swimming pool.
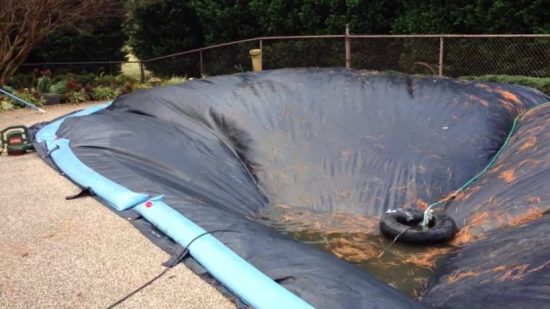
While you are using the pool, a sagging pool cover can allow all of these unwanted things into the water.
If you are wondering how to keep an above-ground or in-ground pool cover from sinking and out of the debris. Then this guide will be helpful for you.
We have grouped solutions for both in-ground and above-ground pool covers. Select the type of pool you are experiencing problems with
The sagging problem is on my
Before you close your pool, get your pool vacuumed and cleaned.
Maintain the balance of your pool’s chemicals. It is essential to prevent algae build-up.
pH levels must be checked ahead of time before pool cover installation, as pH can take some time to adjust.
Useful:
Pool Cover Sagging in Above-Ground Pool
The process of securing an above-ground pool cover is sometimes challenging.
There are various different approaches to covering your pool depending on its size and shape, and what is around the pool for anchoring the cover, as well as the expected weather conditions like rain, wind, and snow.
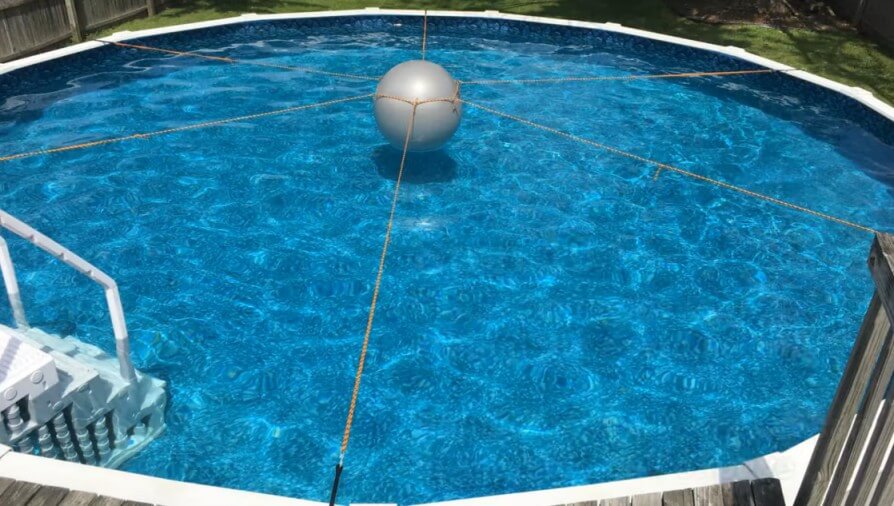
One of the most effective ways to prevent sagging in above ground pool is by ensuring the center of the cover is higher than the sides.
It can be done by lifting the cover at the center portion, which allows the water or dirt to slide off because of the slope.
The best solution for an above-ground swimming pool is the use of a technique that allows the cover to be on the top of the pool in the center.
This winter cover system from PoolTree has been designed in a way that it creates a slope from the center of the pool cover preventing it from sagging.
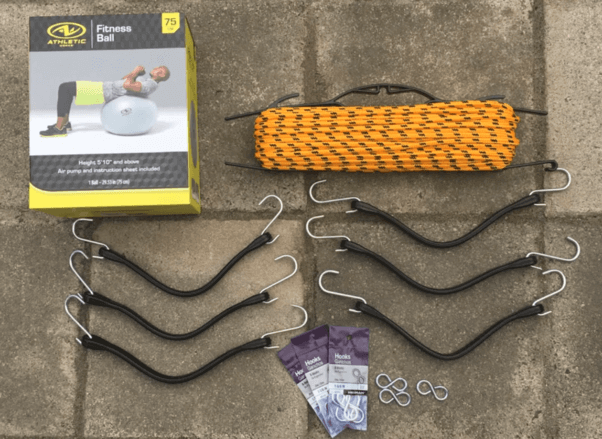
1. PoolTree Winter Cover System
PoolTree Winter Cover System is a ready-made product that you can buy and set up on your above-ground pool.
It features a durable ball and bungee system that is anchored to your deck.
Equipped with the heavy-duty ball, unique harness, and expandable bungee support straps, it holds the aboveground pool covers above the waterline so it can drain and dry itself easily.
As a result of the ball’s upward force and the expandable bungee support straps, the pressure on the pool is reduced and the cover is pushed out of the water.
The mesh cover comes with the pooltree system helps in keeping the dirt, leaves, and insects out.
Below you can see the comparison of how your aboveground pools look like when you have pooltree system setup.
View this post on Instagram
The ball is designed to withstand heavy snow loads and its support system ensures it will not pop or move.
Designed to last through even the coldest winters without losing efficiency, the pooltree system was meant to withstand harsh conditions.
Suitable for use in all seasons, it fits all oval pools & round pools up to 18’x36′.
This setup requires ZERO maintenance, so you’ll have less stress opening the pool in the spring.
Shop Now!Alternatively, if you don’t want to spend 200$ on a PoolTree System, here is a 50$ DIY guide that you can follow,
The products needed for setup.
| Product | Qty | Link |
| 95 cm Exercise Ball | 1 | |
| 100ft Rope | 1 | |
| Bungees with hook | 6* | |
| 8″ Hooks | 6* |
To create a similar slope like the PoolTree system, we will use the same ball size which is 95cm.
Step 1:
- Inflate the exercise ball. (watch this video on how to inflate it)
- Measure the length of your pool from the center to the waterline and cut two different lengths of ropes. 1 rope will go above the exercise ball and other ropes will be connected to it.
For example, if you have a 30 ft pool, then cut the rope 15 ft each of 6 ropes and 1 rope in 10 feet size.
6x rope – 15 feet (A)
1x rope – 10 feet (B)
Note: Length may differ depending on your pool size if you are pool is rectangular then measure the length from center to the waterline and cut the rope accordingly.
Step 2:
Working with 10 feet rope (B) and exercise ball
- Slide all the six 8″ hooks to 10 feet rope and make a taut-line hitch knot for creating an adjustable loop.
- Adjust the loop size to between 1/4 to 1/3 way down the exercise ball.
- Cut off excess slack and tie off each end of the rope to prevent the loop from ever sliding and becoming bigger. You will have a loop that can become smaller but not bigger.

Working with 15 feet rope (A)
- Take each 15 feet rope and slide through the size hooks present in the 10 feet rope (B)
- Create an 8 figure knot around the hooks for each rope.
- For each of the 15 feet ropes (A), tie a taut-line hitch knot on the far end for creating an adjustable loop.
Equally, space all 6 bungees around the pool edge and hook each rope loop onto a bungee.
Adjust each loop by sliding the knot until there is tension on the ropes and rope assembly is no longer touching the water anywhere.
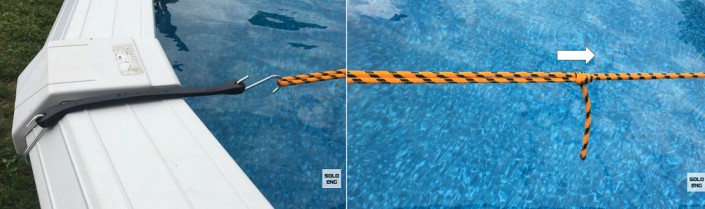
Adjust them equally so the inner loop is centered within the pool.
Place the inside loop around the exercise ball and adjust tension as necessary to keep the ball captive.
Slide your pool cover on overtop of the exercise ball and enjoy the ease of opening your pool next summer.
In case you cannot follow the above guide, watch the video below.

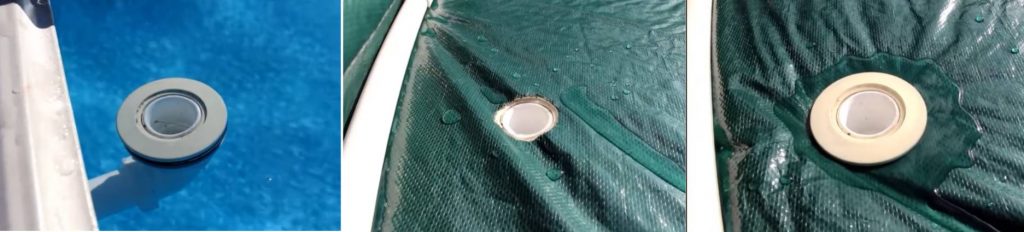
2. Using Gravity Fed Drain
The idea is to install a drain on your pool cover.
The drain is attached to the drain valve on the above-ground pool.
As a result, you no longer need to siphon or pump the water out of the pool, which can cause your pool cover to sag.
Securing the Pool Cover
To do this, you need to ensure that the cover isn’t being blown up and down by the wind.
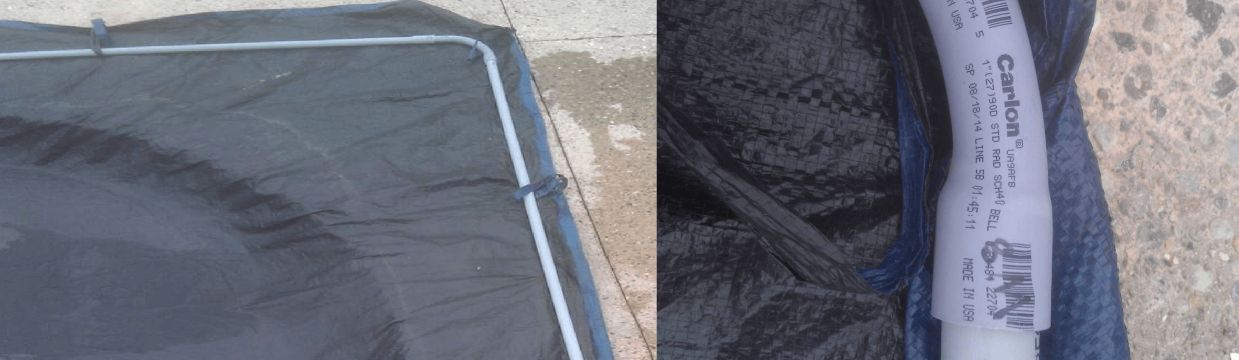
To ensure that the cover stays in place, install a 1-inch PVC pipe around the inside edge of your pool and tighten it firmly.
And push the cover down from the top of the rim and secure it to hold it down, so it doesn’t blow away by the wind.
Note: You do not have to drain your pool below the skimmer. The skimmer can be closed and sealed tightly with a 1 1/2-inch plug and place a small ball on top of it to displace water and prevent freezing.
The products needed for setup.
| Product | Qty | Link |
| 6-Inch Slip Joint Extension | 2 | |
| Swimming Pool Return Inlet | 1 | |
| 90-Degree Elbow with Seal | 1 | |
| Plumbing Tape | 1 | |
| Hose Seal | 1 |

Setting Up
- You have to insert one of the slip joint extensions into the return inlet and secure it tightly. Adjust its height based on the directions of your pool’s original valve. You can cut it down if necessary.
- And then connect the extension with a 90-degree elbow.
- Then use the other joint extension on the other end of the elbow and attach it to the pool’s drain valve.
- Use plumbing tapes and hose seal for better grip and traction when attaching through each end.
From inside the pool, screw the extension in your pool return valve ensuring it fits tightly.
Attach the elbow and pool drain, which will look like the first image below.
Ensure the pool water is below the drain that you have set up.
Then cover the pool cover above. You can use PVC pipe to keep the cover snug, it can help hold down the sagging and maintain firmness all over the place.
Create a hole exactly right at the top of the pool cover and connect the return inlet along with the extension from above the pool cover. (shown in the image below).
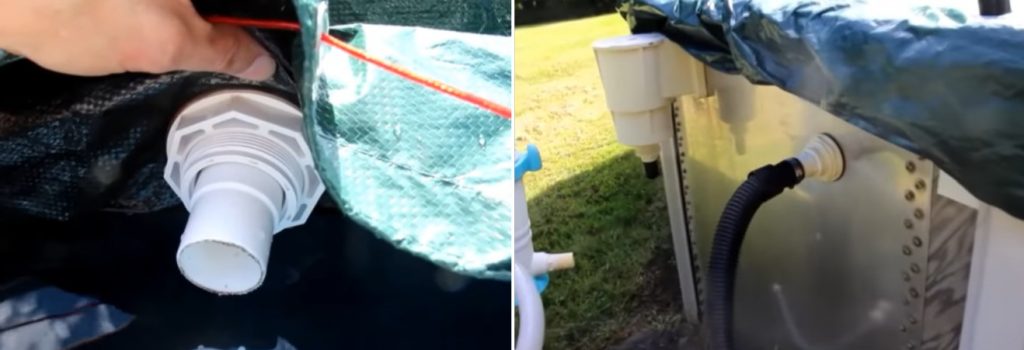
This is how it looks like when you take the pool cover. You can use a hose to connect with the outside drain valve outlet to drain the water from the cover.
Please do watch this video for more instructions.

Pool Cover Sagging in In-Ground Pool
Tarp covers on inground pools tend to sag because of their weight. Sagging can be decreased by anchoring it with more weight on the edge of the cover. This can be done by:
3. Placing Aqua Blocks filled with water, sand, or rocks.
Aqua blocks are a more convenient alternative to the traditional pool cover water bags.
It is very easy to fill and empty them, and they can be stacked when not in use.
Aqua blocks are constructed from thick, black polyethylene to resist cold temperatures. UV inhibitors prevent the blocks from fading and cracking.
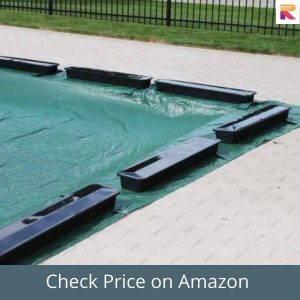
Aqua blocks are easily installed by placing them around the edge of your pool tarp, filling them with water, and then close the top lid. Unlike water bags, they’re much easier to empty during spring.
You can fill it with 3/4
✔️ With water to allow room for expansion due to freezing.
✔️ Use concrete blocks
✔️ Or, you can use sand
The hard plastic material of aqua block makes it more long-lasting than vinyl water bags, which can crack or leak.
Tip: For better results, add rocks at the bottom and fill them with either water or sand.
4. Using Sand Bags
Another alternative to a pool water bag is to use sandbags.
You can buy a sandbags cover and fill it with sand for greater holding power on your cover. Depending on the length of your pool, place the sandbags 1 meter apart.
These bags are made to withstand heavy use. Holds 50 pounds of sand. Using the string you can secure these bags properly as winter begins.
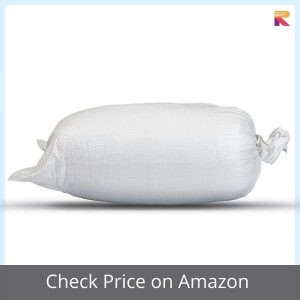
Use sandbag made from polypropylene, a premium quality material. The bottom of this cover comes double-stitched for added strength to hold the adverse conditions.
Tip: Make sure you use a quality sandbag to avoid having trouble getting it out at the end of the season.
5. You can use jugs with either sand or water, tied around the whole pool area.
You can use this method if you have a lot of milk jugs, bleach jugs, and water containers lying around.
It’s much cheaper than pool water bags and aqua blocks, but you need a lot of them for a good hold.
You can
✔️ Fill the bottles with water or sand and space them 2 inches apart.
✔️ Fill them 3/4 and it’ll have some extra room to expand when frozen.
✔️ Place them on the pool cover about 1 meter back from the edge of the water.
Ensure they are tied so they can stay together.
Tip: Add some borax and bleach together on the middle of the cover, as rainwater lowers the pH and kills any algae on the cover.
6. Constructing a PVC pipe connection around the edge of the cover filled with sand or cement.
For those of you who have trouble with pool water bags, aqua blocks, sandbags, or jugs holding the wind, this is your best option, but you need to do it perfectly for it to last.
It involves connecting PVC pipes around your pool cover. The pool cover is then wrapped around the PVC pipes in order to hold them down.
To use this method,
✔️ Use 1 to 1 1/4 inch PVC pipe.
✔️ With pipe fittings, you can connect each pipe according to your pool’s directions
✔️ Once you have added the sand or cement mixed with water you can then seal the ends with a silicone sealant.
✔️ Once everything is in place, roll the pool cover over the pipe.
✔️ With a slip knot, tie the cover to the pipe using the rope.
Since they are all linked together they hold the cover firmly in place.
Tip: Since water accumulates at the center of the cover, it can pull out from under the pipes. You can prevent this by connecting a couple of pipes to the center of the pool cover.

The details of this have been discussed in our article 5 Best Pool Cover Water Bag Alternatives (You Should Try)
The best way to tackle the sagging pool cover on your in-ground pool is using a pool safety cover instead of a solid cover.
7. Use Pool Safety Cover (Permanent Solution to Sagging)
The safety cover creates a safer pool environment when the pool is closed, particularly in an in-ground pool.
When the pool is not in use for long periods of time, the safety cover prevents kids, adults, and animals from falling in.
Pool safety covers use a built-in anchoring system.
The pool safety cover is equipped with straps attached every few feet allowing it to attach to the anchor across your pool deck.
Sagging can be preventable with safety covers where you can use the buckles to tighten up the cover.
The pool safety cover protects your pool from falling debris like tree limbs and also reduces the risk of accidental drownings and other injuries in a swimming pool when not in use.

| Preview | Product | Rating | |
|---|---|---|---|

|
Happybuy Pool Safety Cover Fits 20x40ft Rectangle Inground Safety Pool... | 1,510 Reviews | Check Price |
|
Happybuy Inground Pool Safety Cover 20' x 40' Rectangle, Safety Pool... | 1,510 Reviews | Check Price |

|
WaterWarden Inground Pool Safety Cover 16' x 32', Rectangle, 15-Year... | 936 Reviews | Check Price |
Benefits of Safety Covers
✅ Safety covers are very durable; last till 15 years
✅ They can handle heavy snow loads, making them ideal for winters
✅ Strong enough for children and animals to walk across
✅ If damaged, it is easy to repair
✅ The safety cover can be easily removed at the end of each season
A tighter spring can help your pool cover to regain its balance if it is sagging.
If you find that snow or water accumulates on the cover, blow it off with a leaf blower, sprinkle salt on the cover to help melt it, and use a pump to remove the water.
Sagging pool covers allow trash and water to enter the pool, contaminating the water. By using this guide, you can ensure that your cover remains in perfect condition and stop your pool cover from sinking.